The CQG XL Toolkit has been upgraded to include functionality to place batch orders. A batch order is a list of orders that will include the accounts, symbols, action (buy or sell), qualifiers such as market, limit or stop orders and other important details. The XL Toolkit permits the user to place the orders as parked or sent directly to the CQG Gateway. In addition, Algo Orders can be included in the batch orders. The Algo Orders and the parameters (as a CSV file) can be used. This functionality is detailed later in the post.
First, in order to use the XL Toolkit the user must contact their FCM and request the XL Toolkit enablement. You can download the XL Toolkit here. Once the XL Toolkit is installed you Logon using your trading credentials.
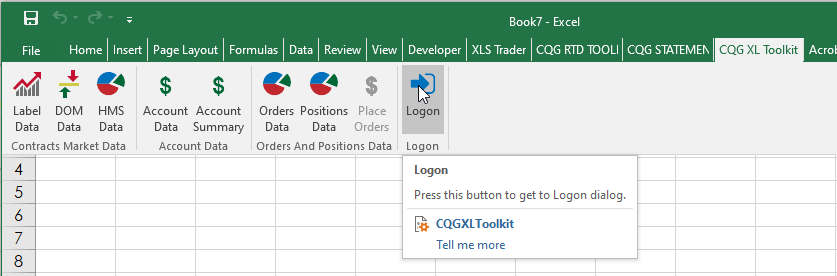
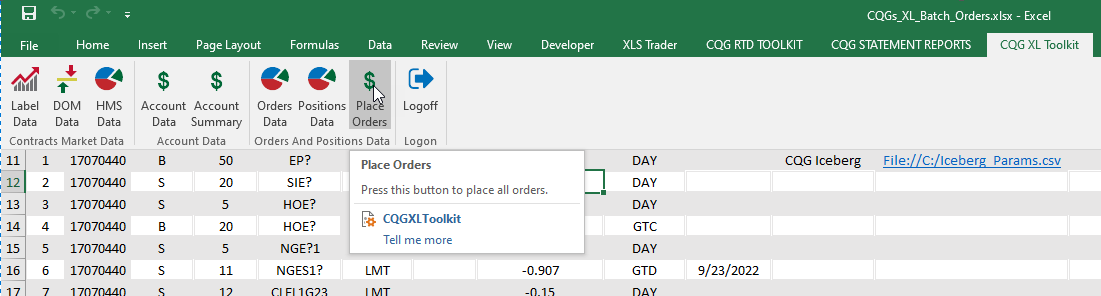
Notice in the image above there is a greyed out button "Place Orders." This button is used to send the orders once the spreadsheet has this function "=CQGXLPlaceOrder()" with all of the Obligatory Parameters entered. The function is a subset of the XL Toolkit's Orders and Positions functions.
Enter this function in an Excel cell:
=CQGXLPlaceOrder()
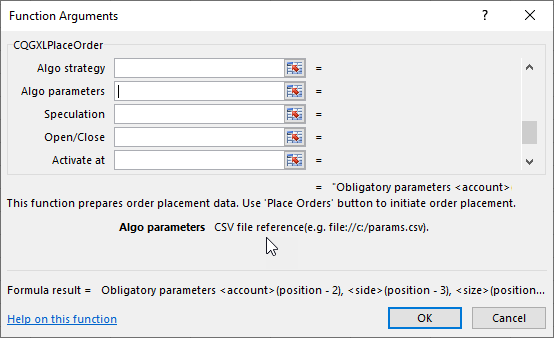
Click the "fx" parameter in the formula toolbar and this dialog opens.
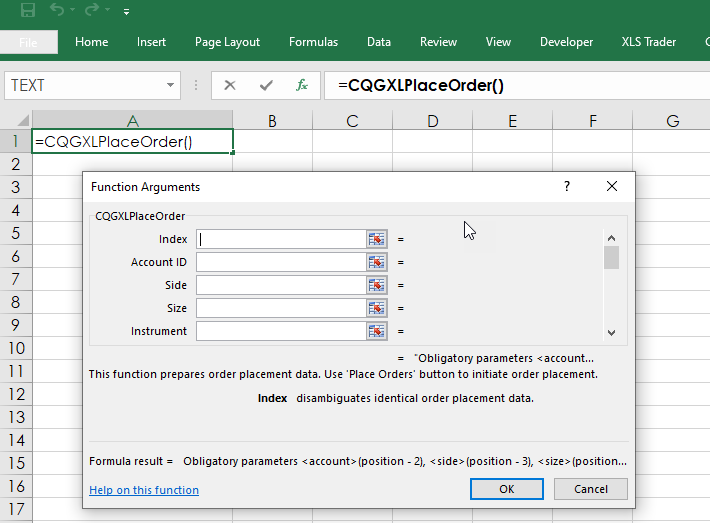
This table details the full list of the function arguments (not all are required):
| Index |
Disambiguates identical order placement data (enter 1, 2, 3, etc.) |
| Account ID |
Account ID from XL Toolkit Account Data |
| Side |
Buy or Sell |
| Size |
Total positive size of the order |
| Instrument |
Symbol |
| Type |
MKT/LMT/STP/STL |
| Stop price |
For STP or STL |
| Limit price |
For LMT or STL |
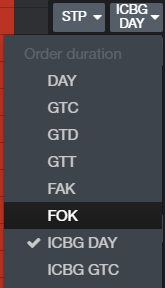
| Duration |
DAY/GTC?GTD |
| Good till date |
GTD Date (Local to the Exchange) |
| Algo Strategy |
Exact Name of the Algorithmic Strategy |
| Algo Parameters |
CSV File |
| Speculation |
Used with contracts that require speculation type to be provided: Speculation/Arbitrage/Hedge |
| Open/Close |
Used to determine open or closing a position. Open/Close/Close Yesterday |
| Activate at |
Time when the order should be sent to the exchange |
| Comment |
Order Comment |
| Park |
Default is Park, False to not Park |
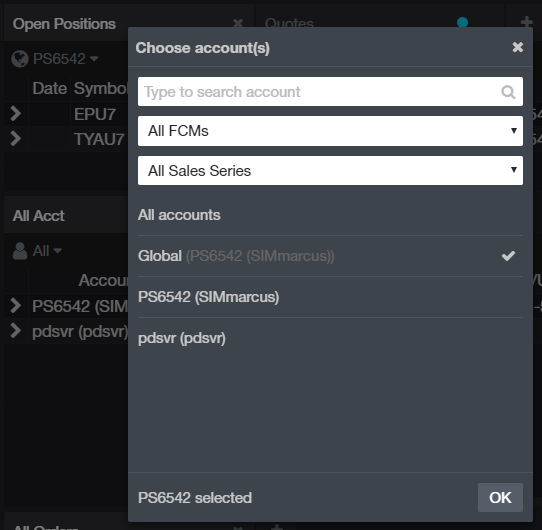
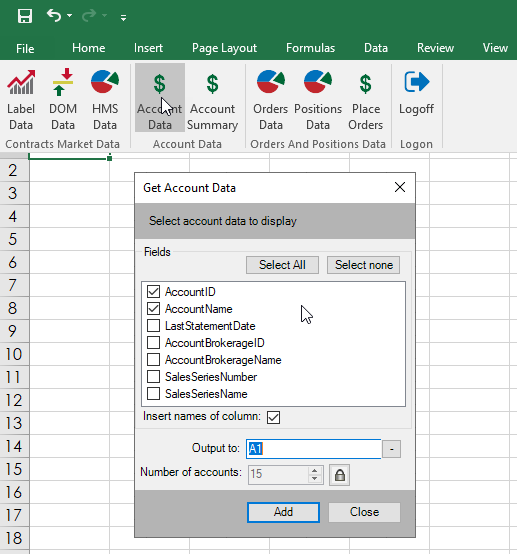
The second argument (Account ID) is found using the XL Toolkit. Select Account data and then Account ID and Account Name, From the output select the appropriate Account ID and you can reference the cell's location in the Functions Arguments dialog.
This sample downloadable spreadsheet with more details is available here.

Using Algo Orders from Desktop or CQG One for Batch Orders
The XL Toolkit Batch Order functionality can place Algo Orders.

This table lists the Algo Orders and a brief description:
| Name |
Algo Description |
| CQG Arrivalprice |
Arrival Price |
| CQG Iceberg |
Iceberg |
| CQG IcePegger |
Series of Peg Orders |
| CQG IceSlicer |
Exchange Iceberg Slicer |
| CQG OffsetPayUp |
OffsetPayUp |
| CQG OffsetTick |
Tick Order as Offset |
| CQG PayUp |
Probability-Based PayUp Logic |
| CQG Peg |
Join Best Levels |
| CQG Riceberg |
Random-Sized Synthetic Iceberg |
| CQG Roll |
Multi-Leg Arrival Price with PayUp Logic |
| CQG RTWAP |
Randomized Time-Weighted Average Price |
| CQG SLArrival |
Stop Limit Arrival Price |
| CQG SLIceberg |
Stop Limit Synthetic Iceberg |
| CQG SLSnipe |
Stop Limit Sniper |
| CQG Snipe |
Liquidity-Taking Sniper |
| CQG Tick |
Tick-BasedPayup Logic |
| CQG TWAP |
Time-Weighted Average Price |
| CQG Vola |
Volatility Order |
| CQG VWAP |
Volume-Weighted Average Price |
More information detailing CQG Algos is available here.
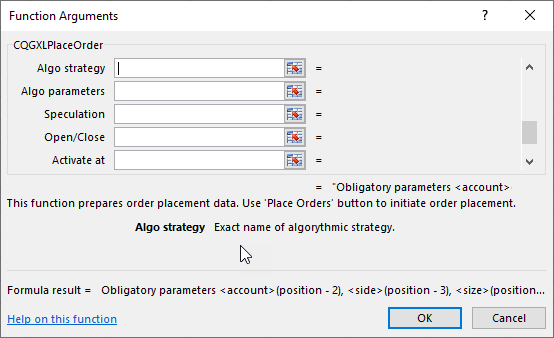
The dialog states that the exact name of the Algo strategy must be used.
Algo orders have parameters which must be included in the batch order as a CSV file. The CSV file is saved to the hard drive.
Here are the steps to creating the parameters CSV file. Basically,
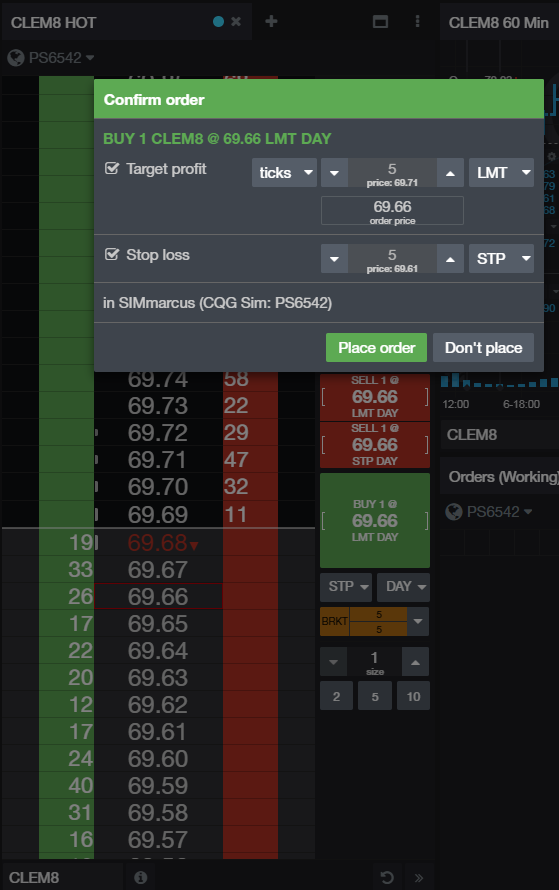
- Place a parked configured Algo Order using the CQG Algo Order Ticket
- Copy the parameters from the Order information window
- Paste it into Excel and save it as a CSV file.
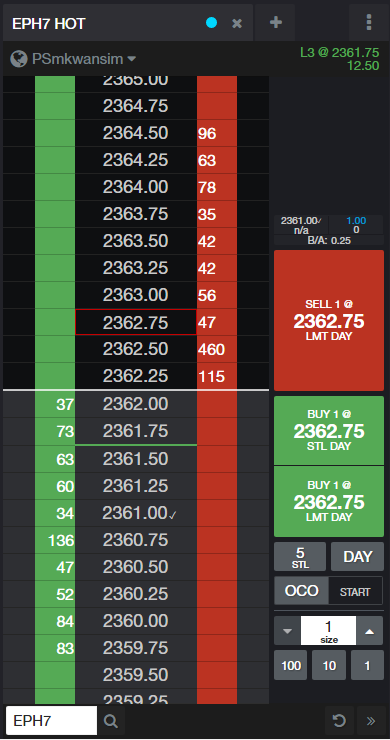
Therefore, open the CQG Algo Order Ticket. Log in, select "Parked" and select the Algo you want. This example is using the CQG Iceberg.
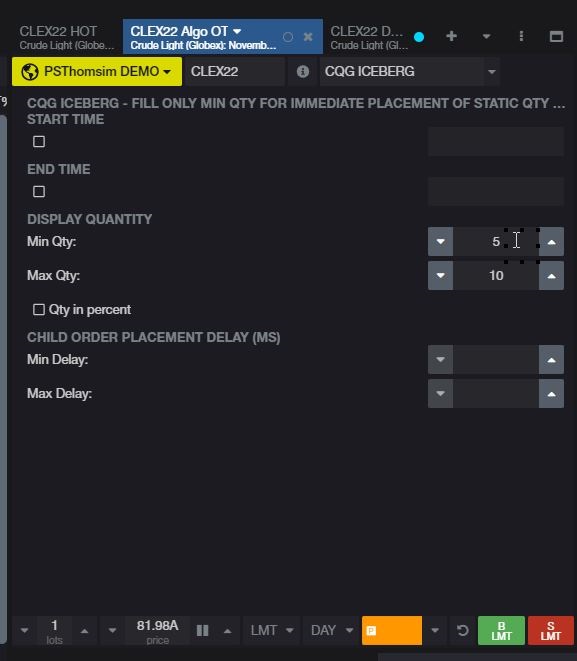
Set the parameters for the Algo Order. Place the Parked Algo Order.
Note: Above, you can set the Start Time and the End Time as part of the Algo Order parameters. The time zone used by the Algo Orders Engine is UTC time (Coordinated Universal Time). It is converted from local time to UTC. Therefore, when using your CSV parameters file with Start and End Times the time zone to use is UTC.
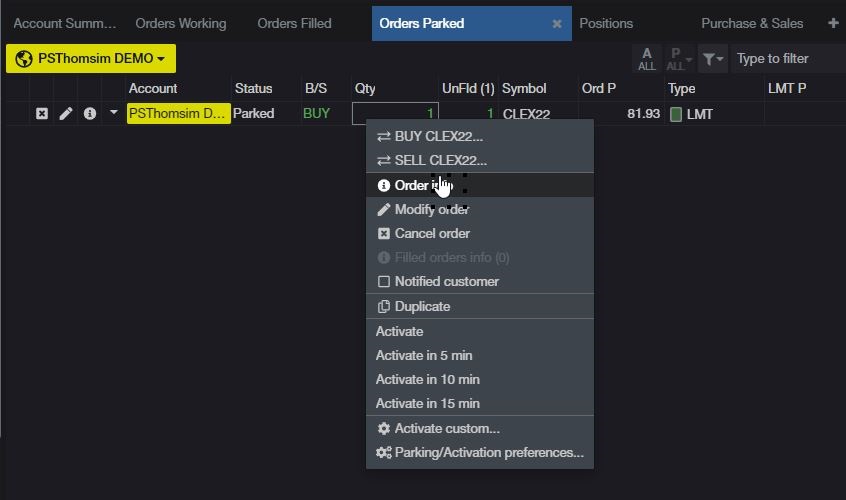
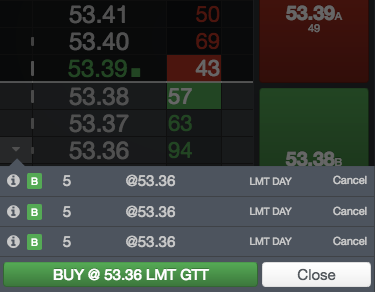
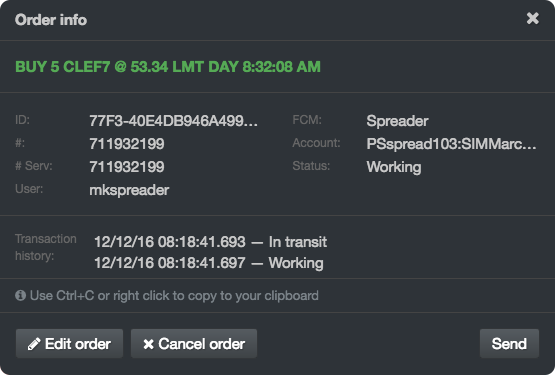
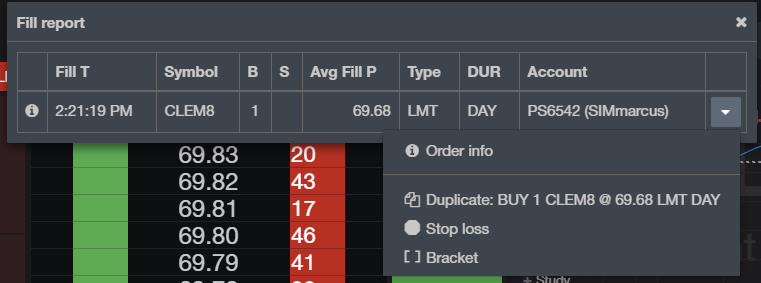
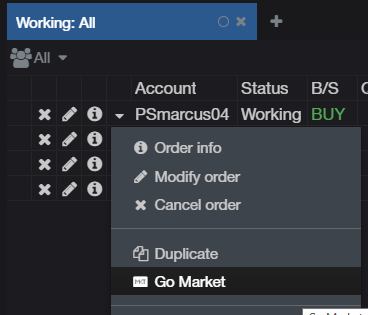
Select the parked order, right-click then select Order Info.
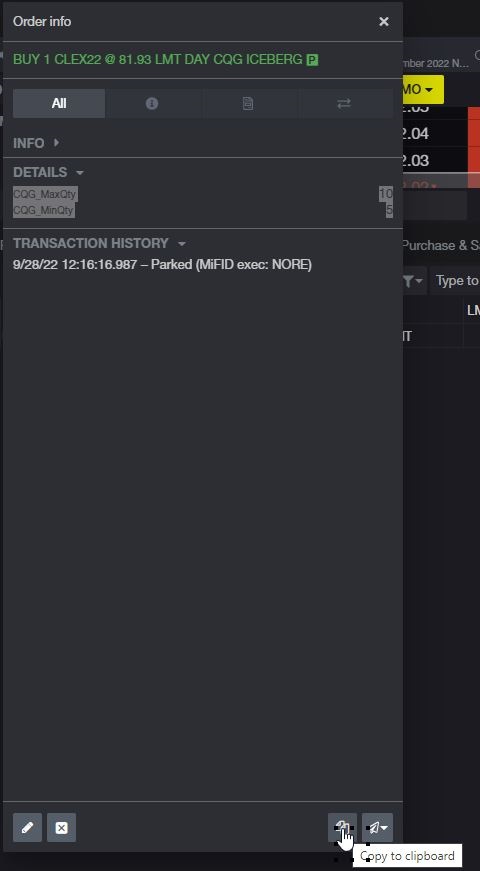
The highlighted text is the parameters information used. Select copy to clipboard.
Open a blank Word document and "paste merged formatting"

The parameters are CQG_MaxQty 10 and CQG_MinQty 5. However, notice that Word displays the parameter name and the value on separate rows. For the Excel CSV file the parameter name has to be the first cell in a row and the parameter value has to be in the next cell in the same row.
Here are the steps in Word to format the correctly format parameters.
CQG_MaxQty
10
CQG_MinQty
5
Select the parameters and replace paragraph returns with tabs.
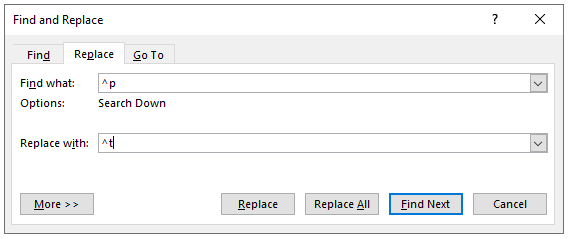
Returns this:
CQG_MaxQty 10 CQG_MinQty 5
Select the above and replace the "tabs and CQG" with "paragraph returns and CQG".

New formatted parameters can be C&P into Excel and saved as a CSV file.
CQG_MaxQty 10
CQG_MinQty 5
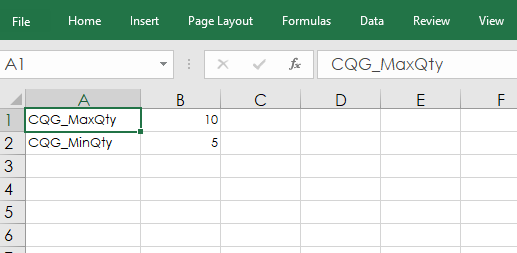
Save the file as a CSV file to the C Drive. Then enter the file's path in the cell for Algo Params.

Once your spreadsheet is completed, then to send the orders in go to the XL Toolkit on the Excel Ribbon and select "Place Orders."